How to Clean a VEVOR Meat Slicer
To clean a VEVOR meat slicer, unplug it first, then remove the blade, food pusher, and food tray and hand wash those parts in warm soapy water. Wipe the base with a damp cloth, dry every part fully, and never put the slicer or its blade in a dishwasher.
On this page (9 sections)
- Why does a VEVOR meat slicer need cleaning after every use?
- What should you have ready before you start?
- How do you take the slicer apart safely?
- How do you wash the blade and removable parts?
- How do you wipe the base and housing?
- How do you dry and reassemble the slicer?
- What routine keeps a VEVOR slicer clean and sharp?
- Which VEVOR slicer are you cleaning?
- The short version
To clean a VEVOR meat slicer, unplug it first, then remove the blade, food pusher, and food tray and hand wash those parts in warm soapy water. Wipe the base with a damp cloth, dry every part fully, and never put the slicer or its blade in a dishwasher.
Learning how to clean a VEVOR meat slicer properly keeps the blade sharp and the food safe. The job takes about ten minutes, and the removable parts make it easier than cleaning a fixed-blade machine.
Every VEVOR slicer in this guide lists hand wash only, so the sink is the right place for the parts.
Why does a VEVOR meat slicer need cleaning after every use?
Clean the slicer after every session because food residue dries hard on steel and harbors bacteria. Deli meat, cheese, and bread all leave oils and crumbs that build up quickly on the blade and carriage.
A dirty blade drags instead of cutting cleanly. Residue on the thickness plate also stops the knob from moving smoothly.
On raw meat, the risk is bigger: juices that sit on the tray or blade can spread bacteria to the next thing you slice.
The parts you touch most are the blade, food pusher, food tray, and slide bar extender. VEVOR makes each of these removable on the 8.6-inch model, so you can take them off and wash them properly.
Wiping the whole unit is possible too, because the meat tray reverses to expose the base.
Set a simple routine: blade and pusher into the sink, tray wiped down, base wiped down. A quick clean now saves a harder scrub later.
What should you have ready before you start?
Gather your supplies first so you aren't hunting for a towel with soapy hands. You need warm water, mild dish soap, a soft sponge, a clean cloth, and a cut-resistant glove.
- A cut-resistant glove for handling the blade
- Mild dish soap and warm water in a basin or sink
- A soft sponge or cloth (no steel wool or abrasive pads)
- A dry towel or rack for air drying
- Food-safe oil for the slide rail and blade hub
Skip anything harsh. Abrasive pads scratch stainless steel and can leave grit near the edge.
Bleach and strong cleaners can pit the blade and dull it faster. A basic soap-and-water wash is all the food-grade parts need.
For a deeper weekly clean, add a soft brush for the blade guard and the crevices around the thickness knob.
How do you take the slicer apart safely?
Unplug the slicer before you touch the blade, and set the thickness knob to its widest setting so the blade is exposed. This is the step where most cuts happen, so slow down.
Remove the food pusher and the food tray first. On the 8.6-inch VEVOR, the food pusher, blade, and slide bar extender all lift out.
The reversible meat tray design lets you flip or remove the tray to reach the base.
To free the blade, loosen the blade cover or retaining nut as your model's manual shows. The 8.6-inch model includes two SUS420 blades, one serrated and one non-serrated, so keep track of which is fitted.
Lift the blade straight off by its center hub.
Never grab the edge, even with a glove. Hold the blade by the hub and set it flat on a towel.
If you're unsure how your model releases the blade, the manual has the exact sequence.
How do you wash the blade and removable parts?
Hand wash the blade, food pusher, and tray in warm soapy water, then rinse and dry them fully. VEVOR lists hand wash only for all three slicers here, so keep them out of the dishwasher.
Wash the blade one side at a time on a flat surface. A soft sponge works along the flat face and the serrations without dulling the edge.
The serrated blade on the 8.6-inch model needs a little more care in the grooves; a soft brush helps.
The food pusher has raised spikes on the 10-inch models, so work the sponge between them. The food tray is stainless steel on the 8.6-inch and 10-inch models and wipes clean easily.
Rinse everything and dry with a clean towel. Dry the 10-inch carbon steel blades well, since water left on them can start surface rust.
How do you wipe the base and housing?
Wipe the base and housing with a damp cloth and mild soap, then dry them right away. Never rinse or submerge the motor housing, and keep water away from the switch and cord.
Unplug the slicer and wrap the cord loosely so it doesn't dangle near the wet parts. Wring the cloth so it's damp, not dripping, and wipe the carriage rail, thickness knob, and the area under the tray.
A soft brush or a cloth-wrapped finger reaches crumbs near the blade guard. Avoid spraying cleaner directly at the switch or motor vents.
Dry the base with a separate towel. Pay attention to the rail where the carriage slides, since moisture there can make the action sticky.
Leave the slicer open to air dry fully before you put the blade back.
How do you dry and reassemble the slicer?
Every part must be completely dry before it goes back on the slicer. Water trapped around the blade hub or under the tray can cause rust and harbor bacteria.
Set the blade flat on a dry towel and let it air dry after towel drying. Do the same with the food pusher and tray.
Check the hub area and the blade's center hole for any drops.
Reassemble in reverse order: blade first, then the food pusher and tray. Make sure the blade seats fully on its hub and the retaining nut or cover is snug.
Don't overtighten, since the blade needs to spin freely. Once assembled, turn the thickness knob through its full range to confirm it moves smoothly.
If it feels stiff, the plate may not be seated correctly.
What routine keeps a VEVOR slicer clean and sharp?
Clean after every use and do a deeper clean once a week, and your slicer will stay hygienic and cut well for years.
- Wipe the blade and tray after each session so residue never dries.
- Do the full teardown weekly, or after slicing raw meat.
- Keep the blade covered when the slicer is stored.
- Oil the slide rail and blade hub lightly after cleaning.
The 8.6-inch VEVOR ships with two blades: a serrated one for bread and crusty items and a non-serrated one for meat and cheese. Store the spare blade in its sleeve, away from moisture.
If you slice frozen meat often, expect more residue and a slightly longer clean. Our guide on whether a meat slicer can cut frozen meat covers how the blade and motor handle it.
For upkeep, a sharp blade matters more than a fancy cleaning product.
Which VEVOR slicer are you cleaning?
The three VEVOR slicers here share the same cleaning method, but they differ in blade type and size. Pick the model that matches your kitchen, then follow the steps above for its parts.
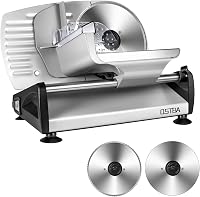
VEVOR 8.6-Inch Deli Slicer: the home all-rounder
The 8.6-inch VEVOR is the easiest of the three to clean at home. Its blade, food pusher, and slide bar extender all remove for a thorough wash, and the reversible meat tray lets you wipe the base.
It has a 200W motor running at 70–100 RPM and slices from 0 to 0.6 inches. The dual security lock and suction cup feet keep it stable while you work.
At 14 pounds it's the lightest of the three and easy to move near the sink.
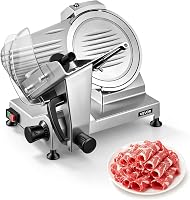
VEVOR 10-Inch 240W Meat Slicer: the larger blade for bigger jobs
The 10-inch 240W model has a 45# carbon steel blade with a built-in sharpening stone. Its food tray, food holder, and food pusher are removable, so the cleaning routine is the same.
The 240W motor runs at 350–400 RPM and slices from 0 to 0.47 inches. At 34 pounds it's heavier to move, so clean it where it sits rather than carrying it.
Dry the carbon steel blade carefully, since it's more prone to surface rust than stainless.
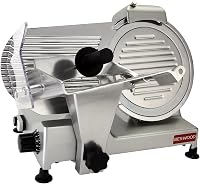
VEVOR 10-Inch 300W Meat Slicer: the high-speed option
The 300W model reaches 300–450 RPM and runs at 60dB. Its blade, food holder, and pusher are detachable for cleaning, and the stainless steel food tray wipes clean.
The plastic exterior is lighter than aluminum alloy and won't rust, and it includes a built-in sharpener and blade guard. At 24.9 pounds it's lighter than the 240W model.
Wipe the plastic housing with a damp cloth and avoid abrasive cleaners that can dull its finish.
For help choosing between models before you clean one, see our roundup of the best meat slicers for the money. If you're comparing brands more broadly, our guide to what is the best brand of meat slicer weighs the options.
A CUSIMAX meat slicer review is useful if you're still deciding which machine to buy.
The short version
Cleaning a VEVOR meat slicer comes down to a simple order: unplug, remove the blade and removable parts, hand wash them, wipe the base, dry everything fully, then reassemble. Do it after every use and the slicer stays safe and sharp.
Pick the 8.6-inch VEVOR if you want the easiest home teardown with two blades. Choose the 10-inch 240W for a larger blade and built-in sharpener, or the 300W for higher speed and a lighter plastic body.
Whichever model you own, the cleaning method is the same. Keep a cut-resistant glove near the slicer and never put the blade in the dishwasher.
Frequently asked questions
How often should I clean a VEVOR meat slicer?
Clean the blade, food pusher, and tray after every use, and wipe the base each time too. Do a deeper clean of the housing and blade guard weekly, or sooner if you slice raw meat.
Frequent light cleaning keeps food residue from drying onto the blade.
Can I put VEVOR meat slicer parts in the dishwasher?
No. VEVOR lists hand wash only for its meat slicers, so wash the blade, pusher, and tray by hand in warm soapy water.
A dishwasher can dull the edge and wear the finish.
Dry every part before you put the slicer back together.
How do I remove the blade from a VEVOR meat slicer?
Unplug the slicer and set the thickness knob to its widest setting so the blade is exposed. Then loosen the blade cover or retaining nut as your model's manual shows and lift the blade straight off by its center hub.
Wear a cut-resistant glove and never touch the edge.
What should I use to clean the blade?
Use warm water, mild dish soap, and a soft sponge or cloth. Avoid steel wool and abrasive pads, which can scratch the steel and leave grit near the edge.
Rinse well and dry the blade completely before storing or refitting it.